Run the OCC community site
The public pages fill themselves from what’s in the site: events from Events, groups from Planning Center and the groups here, training from the courses, pictures from Media. Here’s where each one lives.
For OCC staff with an admin account. The screens below come from a demo; every person in them is made up. Courses have their own guide: Build a course on the OCC community.
The links
What lives where
| On the public site | Comes from | Who changes it |
|---|---|---|
| Events page, the next event on Home, and This week on the News Feed | Events in the admin | Staff |
| Get Connected (Groups, signed in) and the finder on Home | Groups from Planning Center, and any group here with a campus (Manage, Where and when) | Planning Center’s group leaders and staff; a group’s leaders |
| Training page | BB Courses; free or paid comes from Memberships | Course teachers, staff for prices |
| The picture at the top of each page, and each campus’s cover | Media: a picture’s Use on the site | Staff with an admin account |
| The words on Home, Get Connected, Events and Training | The site’s theme | Terrance (ask him for changes) |
Events
-
Add an event
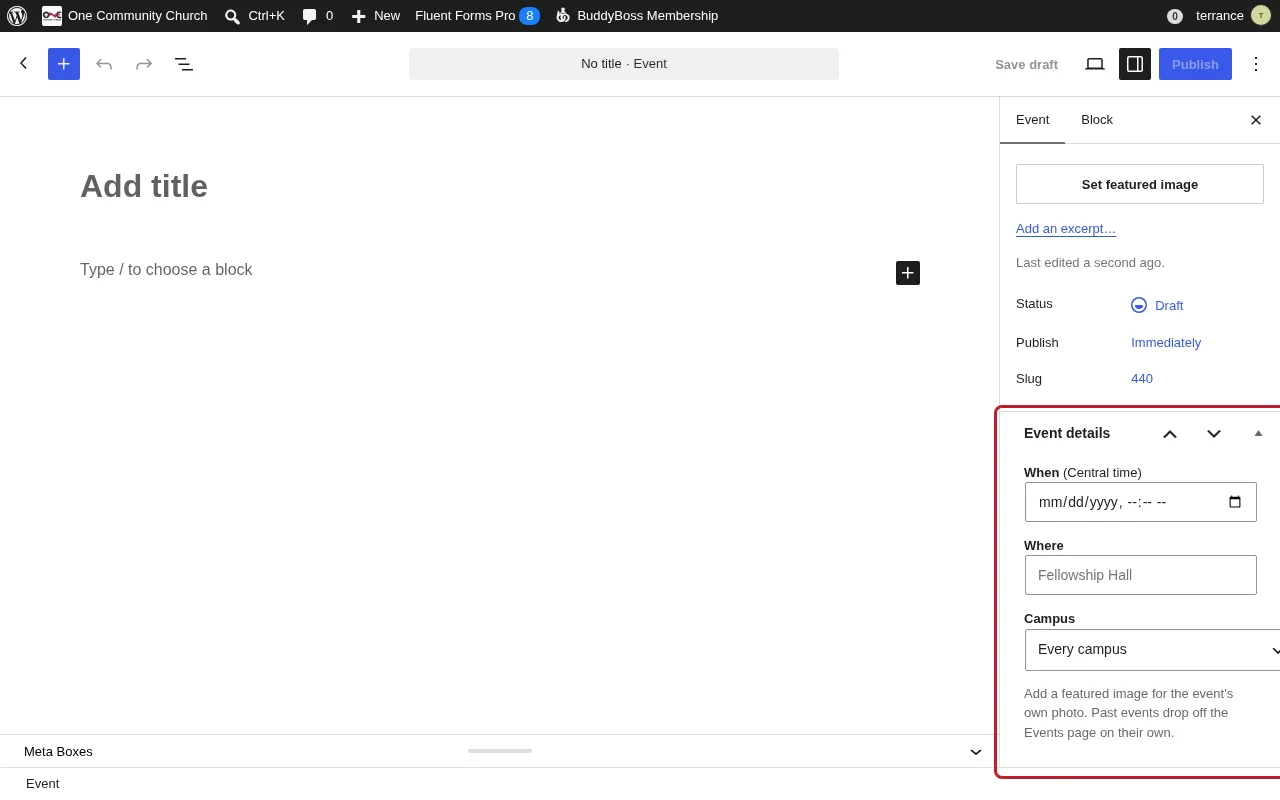
In the admin, open Events, then Add event. Type the name and a short description. In Event details on the right, set when (Central time), where and the campus. Add a featured image for the event’s own photo; without one, the event shows its campus’s picture. Then press Publish. Past events drop off the Events page on their own.
-
Check it on the Events page
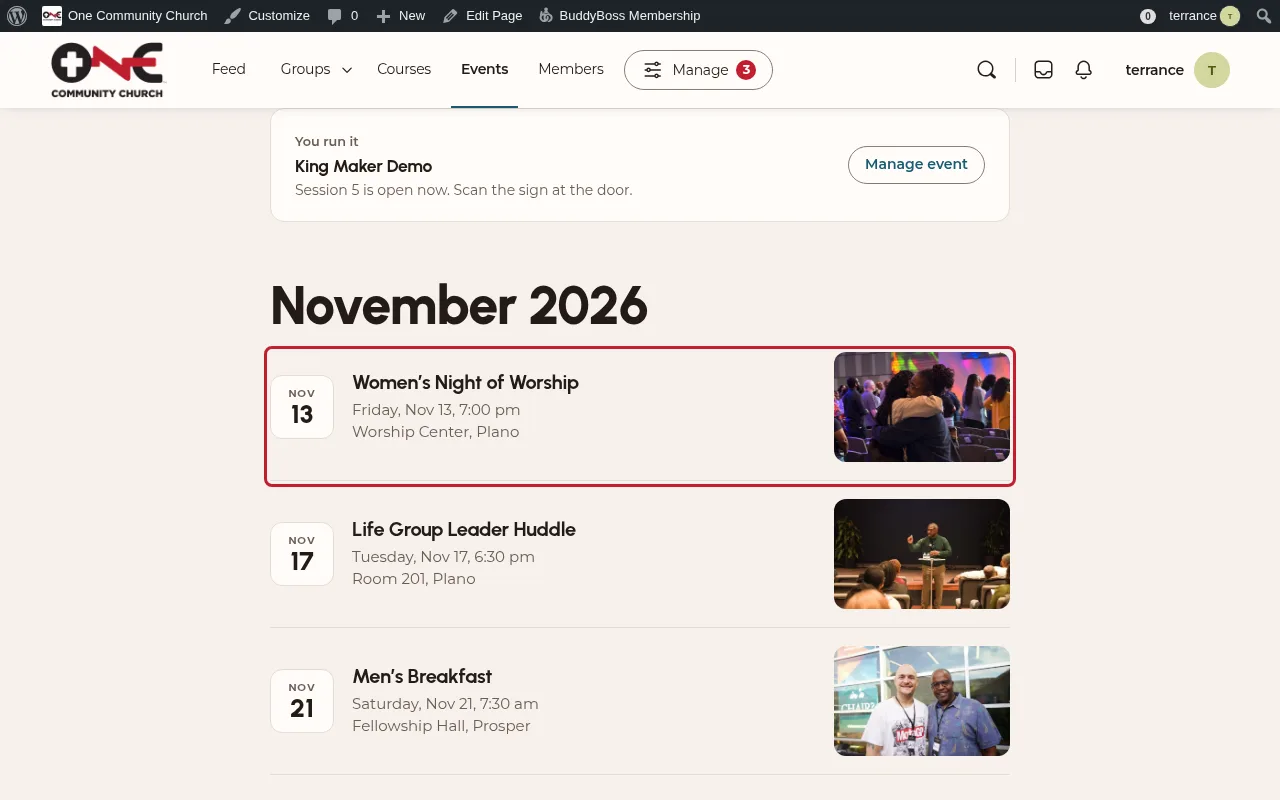
Open Events on the site. Events list by month, soonest first; the next one also shows on Home.
-
Events with sessions and a door
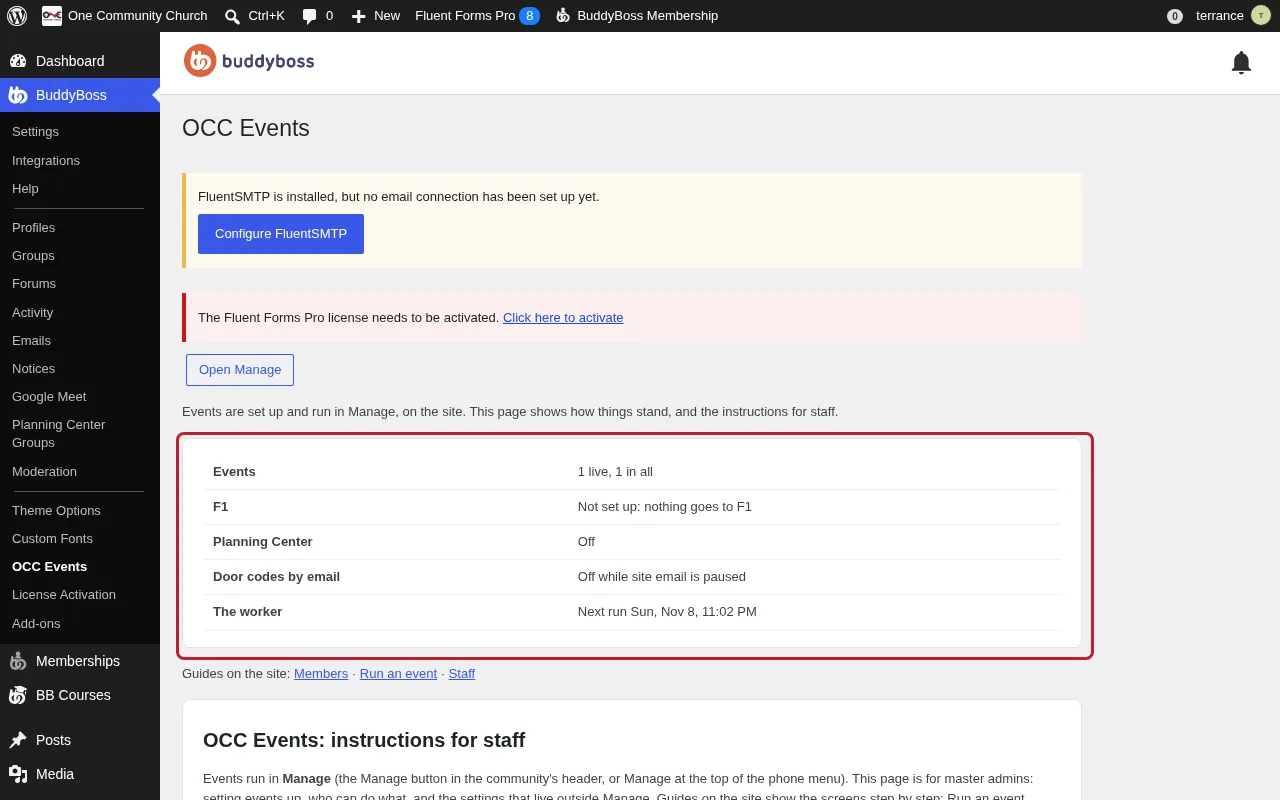
Events people sign in to (King Maker, and anything with sessions) run in Manage on the site: see Run an event. In the admin, BuddyBoss, then OCC Events shows how things stand (live events, F1, the worker) and the instructions for staff. Give someone the Master admin role under Users to let them set up events.
Groups
-
Put a group on Get Connected
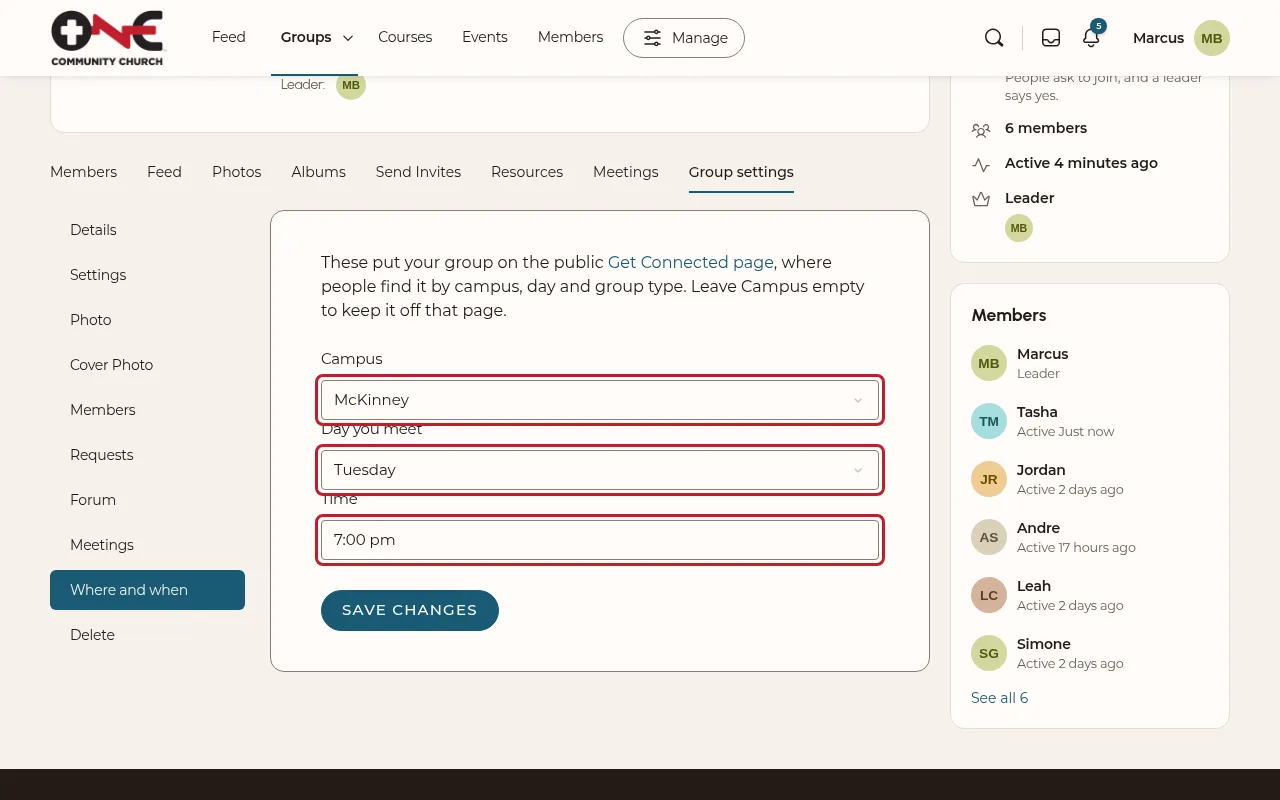
Groups from Planning Center come with their campus, schedule and tags (who it’s for, ages, how it meets), and show on Get Connected on their own. For a group made here, its leaders set the campus, day and time under Manage, then Where and when; as an admin you can do it for any group. Leave Campus empty to keep a group off the public page. Signed-in members see every group that isn’t hidden.
-
Give a course to a group
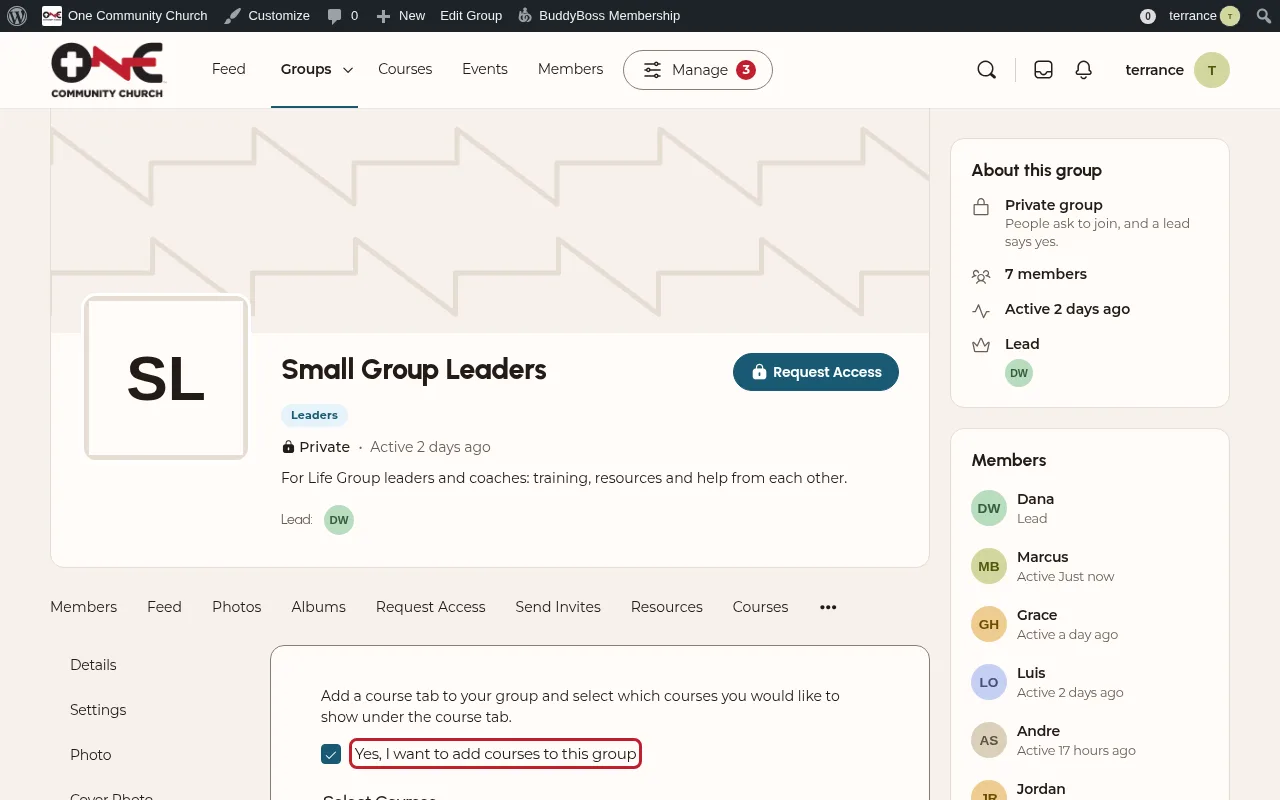
Open the group, then Manage, then Courses, tick Yes, I want to add courses to this group and choose the courses.
-
Meetings with Google Meet
Under BuddyBoss, then Google Meet, the site is connected to the calendar of no.reply@onechurchhome.org, so meetings are made there and nobody is invited by email. Choose whether every group gets a Meetings tab or each group’s leaders turn it on. The leaders’ guide shows scheduling: Meet online.
Planning Center
-
Groups come from Planning Center
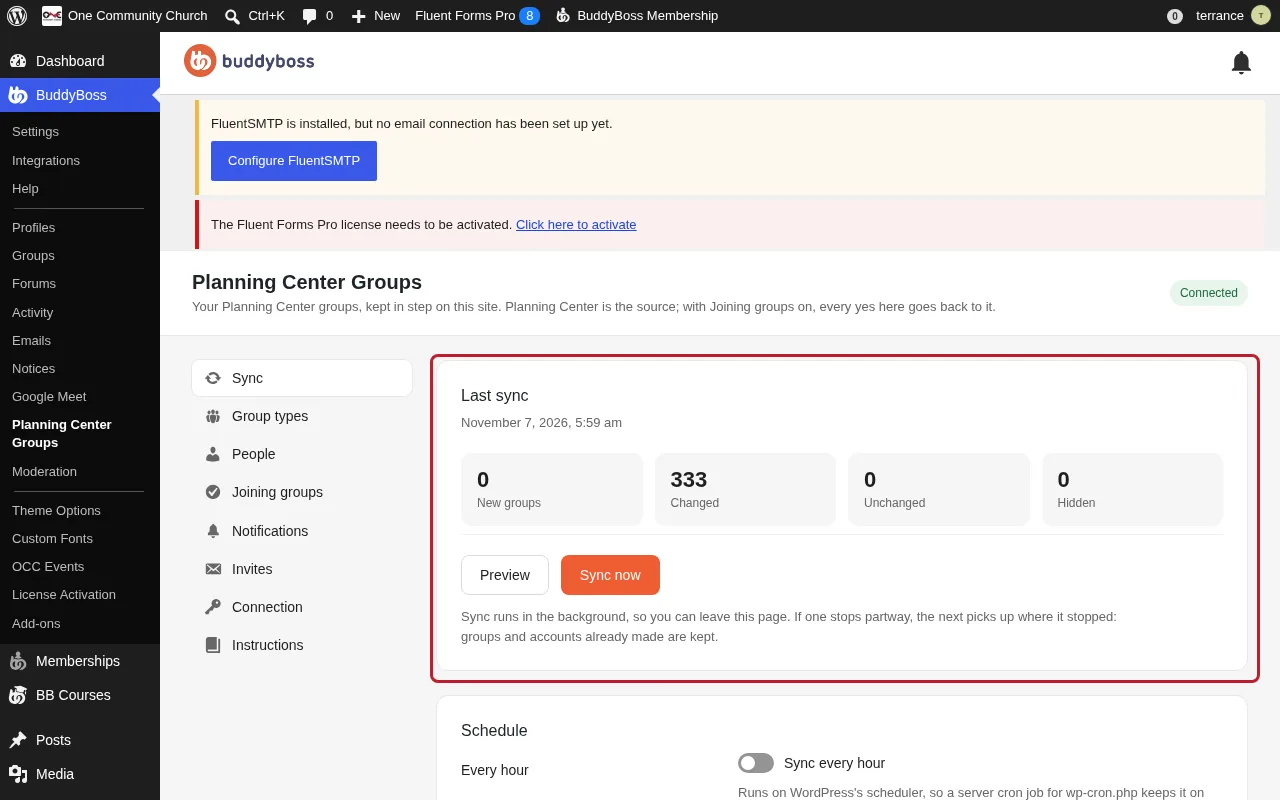
Open BuddyBoss, then Planning Center Groups. The sync runs every hour, one way: each Planning Center group becomes a group here with its kind (Life Group, Ministry and so on), its campus, its schedule and its tags, under its campus’s group. Change a group in Planning Center, not here. Preview shows what a sync would change before it does anything.
-
People and invitations
The People panel adds each group’s adult members as accounts, with their email and phone from Planning Center, and fills in profile fields you map. Invites holds the invitation email they get to set a password. Nothing goes out while the site’s email is paused (below), and never between 8 pm and 7 am.
-
Joining groups, both ways
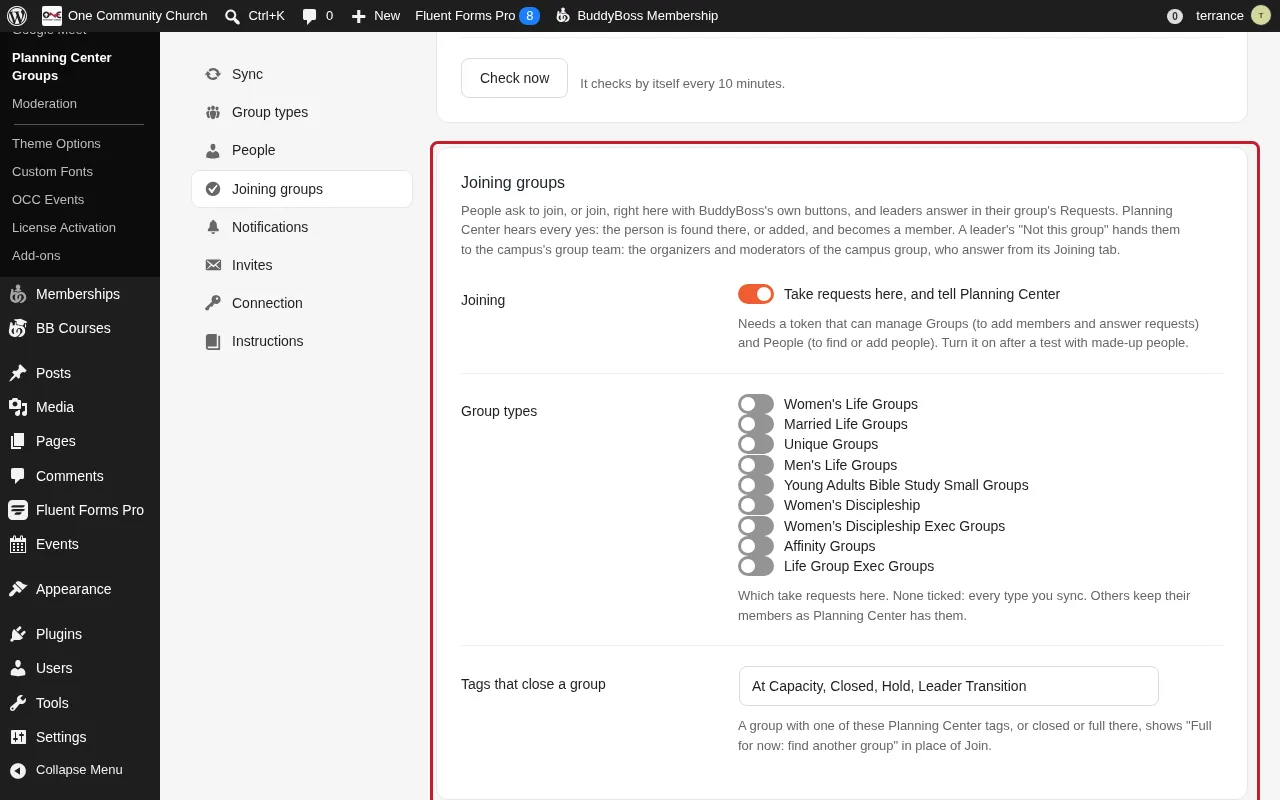
The Joining groups panel lets people ask to join and join here, with Planning Center hearing every yes: it finds or adds the person there and makes them a member. Church Center’s requests come in, and the answer given here goes back. Choose which kinds of groups take requests, the timing for leaders, and the Find a Life Group form. Its numbers show what’s with leaders, with campus teams, and anything that didn’t reach Planning Center, with Try again. Each campus’s group team is the moderators of its campus group: see Help people find a group.
-
Instructions in each plugin
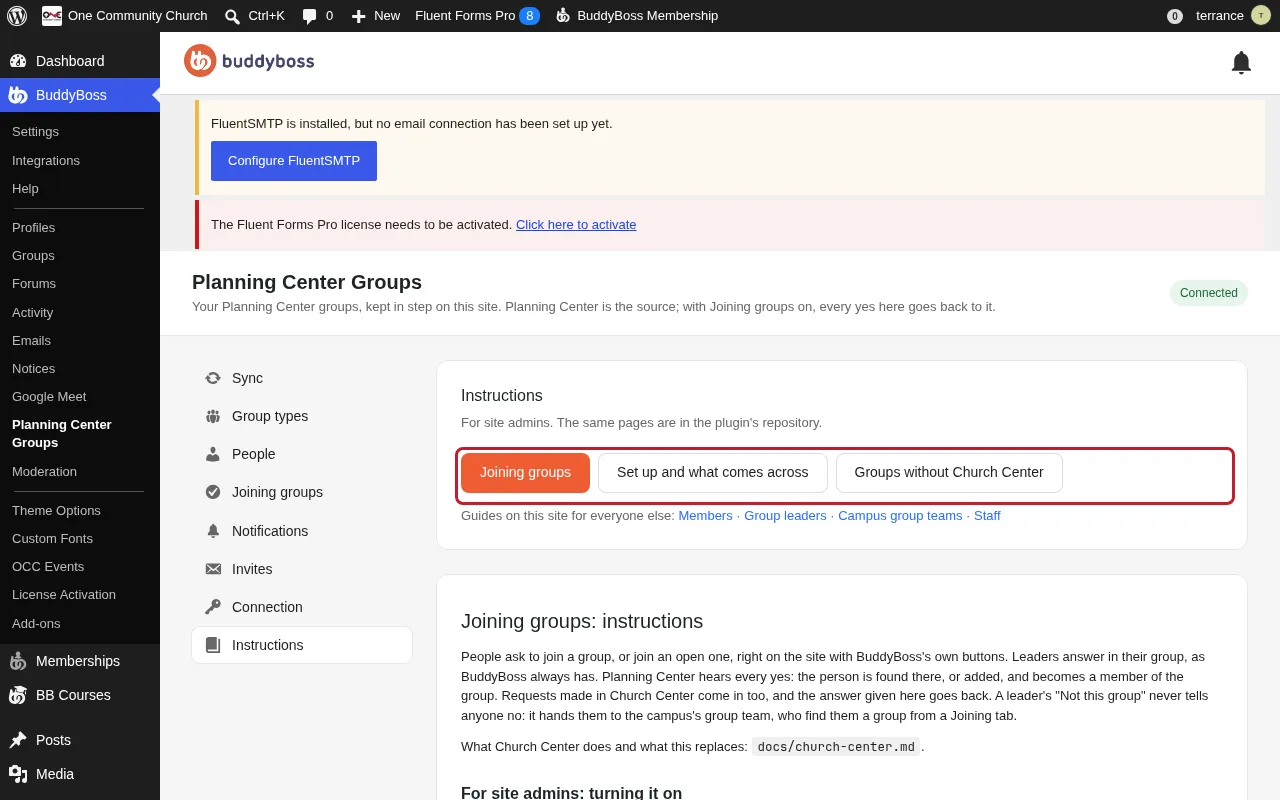
Each of the site’s own plugins has its instructions in the admin: Instructions in Planning Center Groups and in Google Meet, and OCC Events under BuddyBoss. On the Plugins screen, each has an Instructions link. They’re the same pages that live in each plugin’s repository.
Photos
-
Choose the picture for a page or a campus
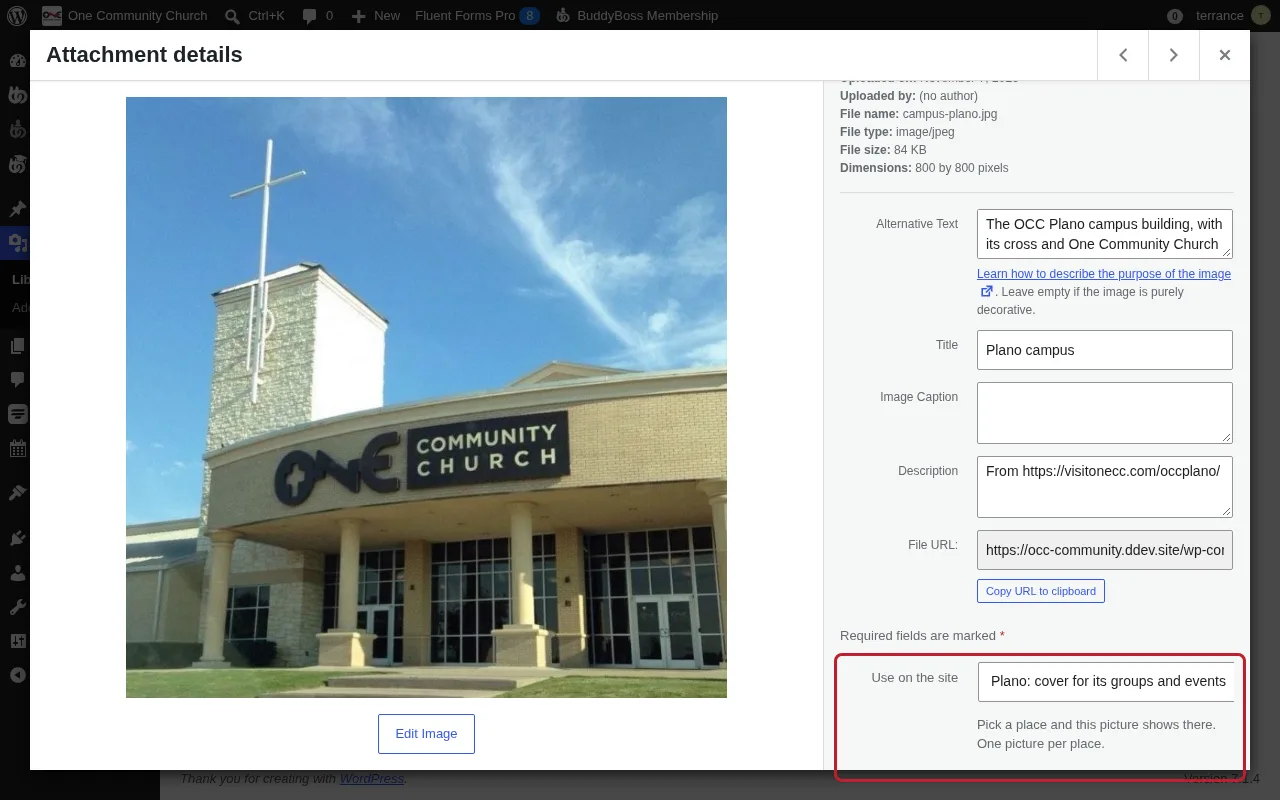
Open Media in the admin and click a picture. Under Use on the site, pick where it goes: the top of Home, Get Connected, Events, Training or Guides, or a campus’s cover. A campus’s cover shows on that campus’s groups and events that don’t have a picture of their own. One picture per place; the one there before is let go.
Every picture has a description for screen readers and where it came from. Add only real OCC photos: no children, and nobody in a private moment like prayer without their okay.
People and roles
-
Add someone or change their role
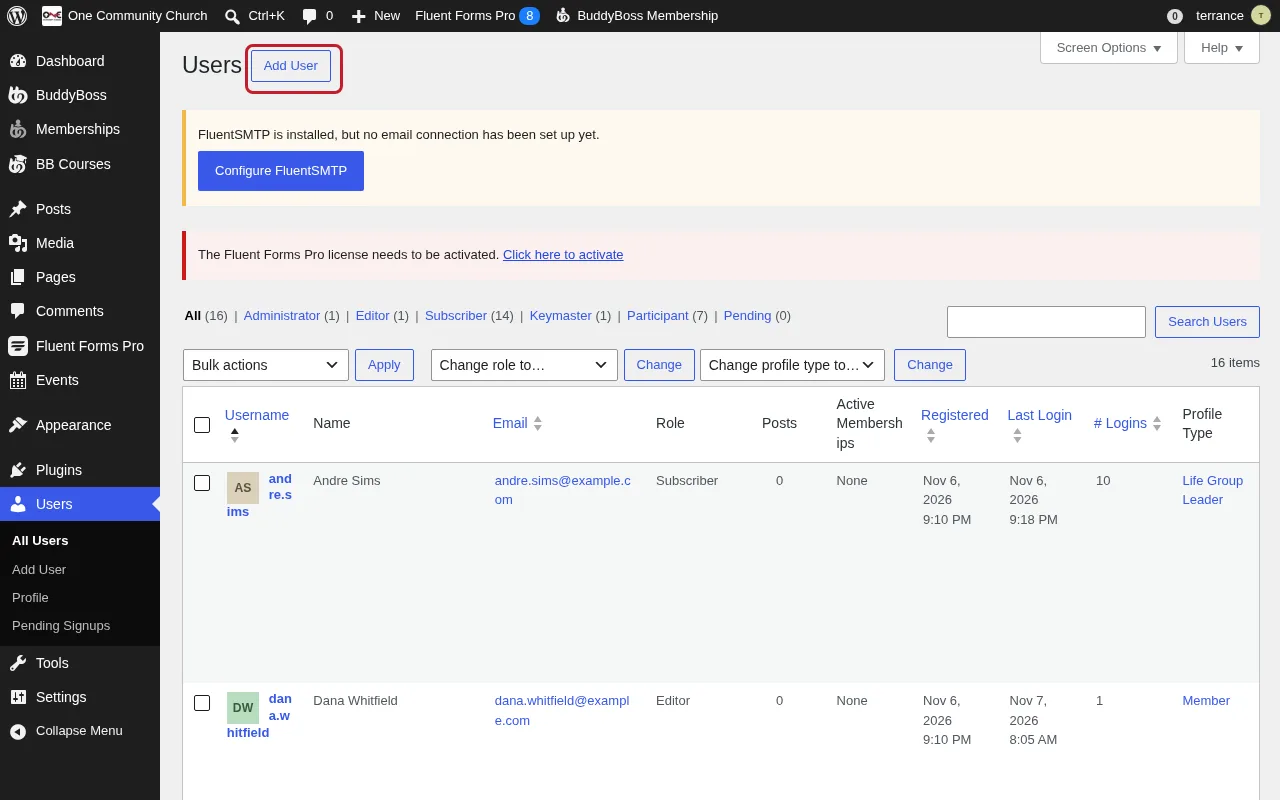
Open Users in the admin. Most people join from the site themselves. Use Add User for someone who needs an account made for them. Change a role from the list: Subscriber for members, Editor for course teachers, Administrator only for staff who run the site. Group leaders don’t need a special role; a group’s organizers lead it.
Everyone also has a profile type, shown as a badge: Pastor, Staff, Ministry Lead, Life Group Leader, Volunteer or Member. Set Pastor, Staff or Volunteer on the person’s profile in the admin. Leading a group sets the rest on its own: a Life Group’s leader becomes Life Group Leader, a ministry’s leader Ministry Lead, and they go back when they stop. Pastors and staff can make any group, Ministry Leads ministries and events; others ask staff.
-
The site’s email is paused
Under Settings, then General, Site email is paused, so the site sends nothing yet except to admins. When it’s on, anything due between 8 pm and 7 am Central waits until 7 am.
Paid courses
-
Set a price
A course is free unless a membership protects it. A paid course has a product under Memberships, then Products, with its price, and a rule under Rules that opens the course to people who bought it. People who haven’t bought it see the description, the price and Get the course. Payments need a payment processor connected first.